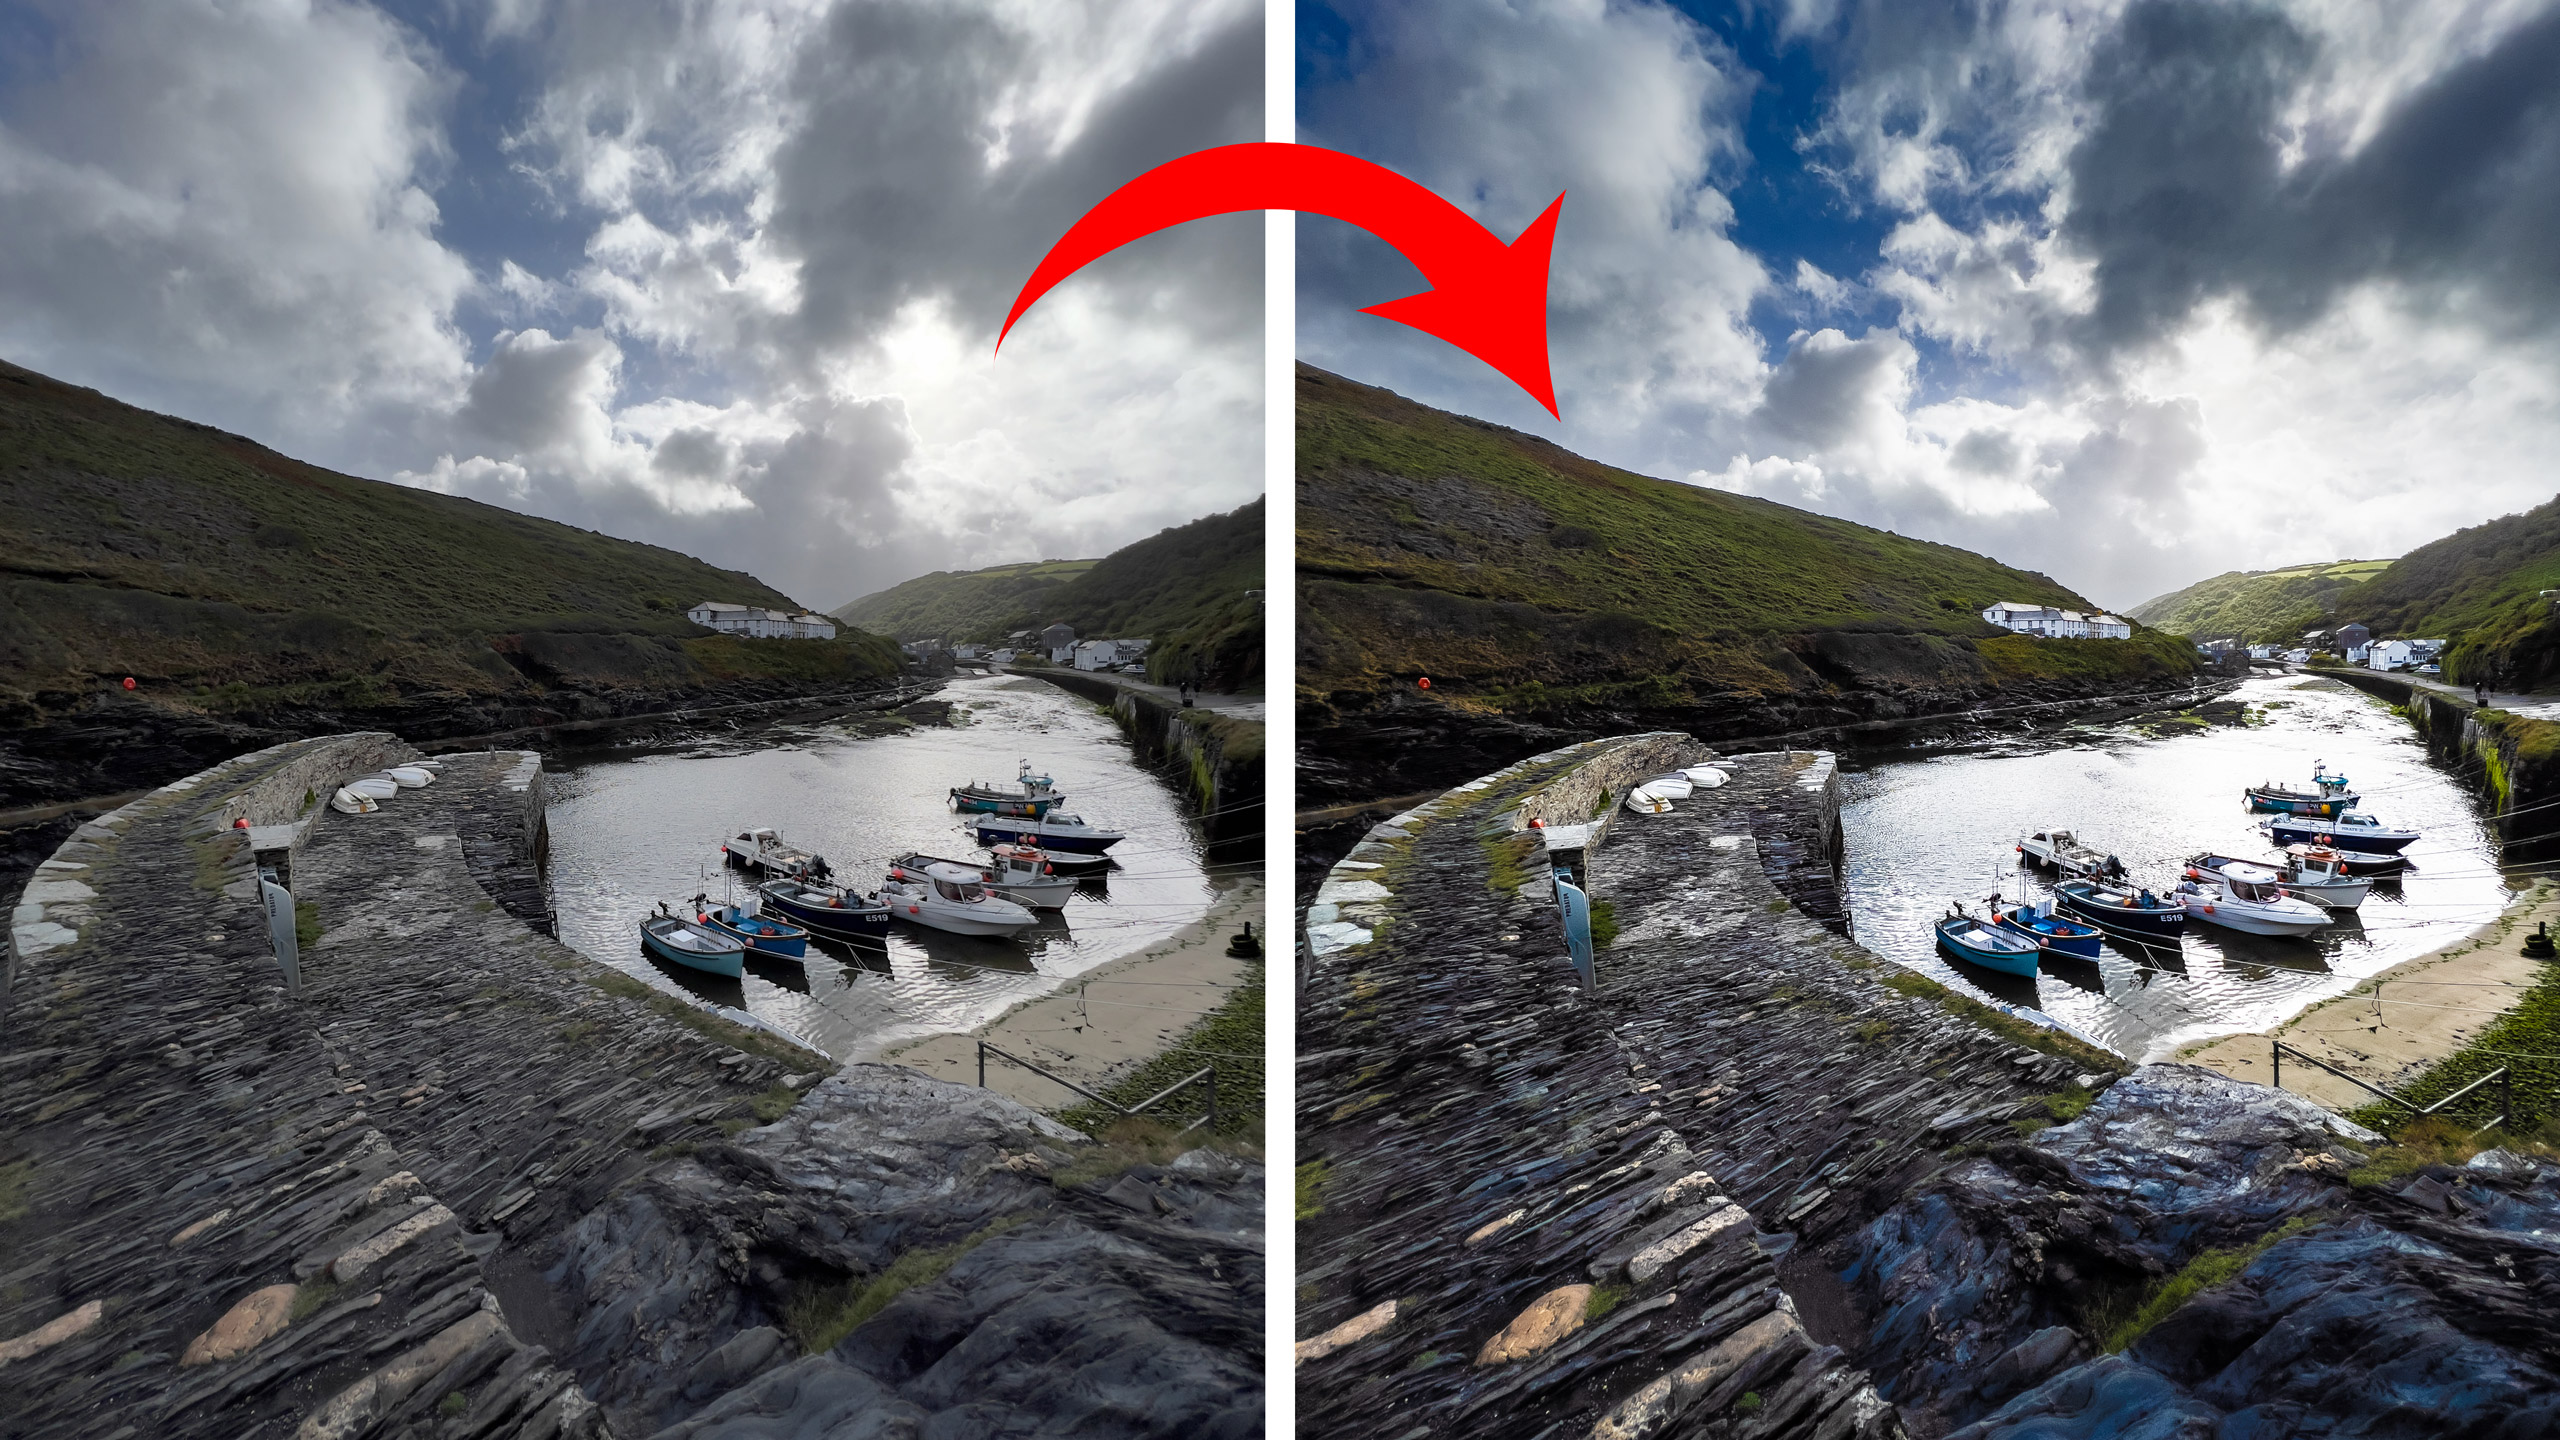
Apple’s HDR usually does a good job in extreme lighting, but sometimes the results can just look a little flat
(Image credit: Rod Lawton)
You used to be able to switch the iPhone’s HDR mode off, right? I remember when you had the option to use HDR or not, or even save a non-HDR version of the photo as well. So I went looking for that option on my iPhone and it’s gone. It’s not just moved to a different place, it’s gone altogether.
It turns out it was removed some time ago and you no longer have this option even in thebest iPhones.Apple’s support page says:
“By default, iPhone automatically uses HDR when it’s most effective. On some iPhone models, you can manually control HDR instead. On iPhone XS, iPhone XR, iPhone 11 models, iPhone SE (2nd generation), and iPhone 12 models:
“Go to Settings > Camera, then turn off Smart HDR. Then from the camera screen, tap HDR to turn it off or on. On iPhone 8, iPhone 8 Plus, and iPhone X: Go to Settings > Camera, then turn off Auto HDR.”
So that’s it. Now we’ve got HDR photos whether we want them or not. To be fair, the iPhone does usually do a good job – but not always. It’s ‘proper’ HDR, where the camera is merging separate exposures and not just doing a bit of shadow adjustment.
However, sometimes it can look a little unnatural – and sometimes the iPhone compresses the tonal range so much to capture it all that the photo just looks a bit flat.
>>>A2660 Battery for Apple iPhone 13 Mini
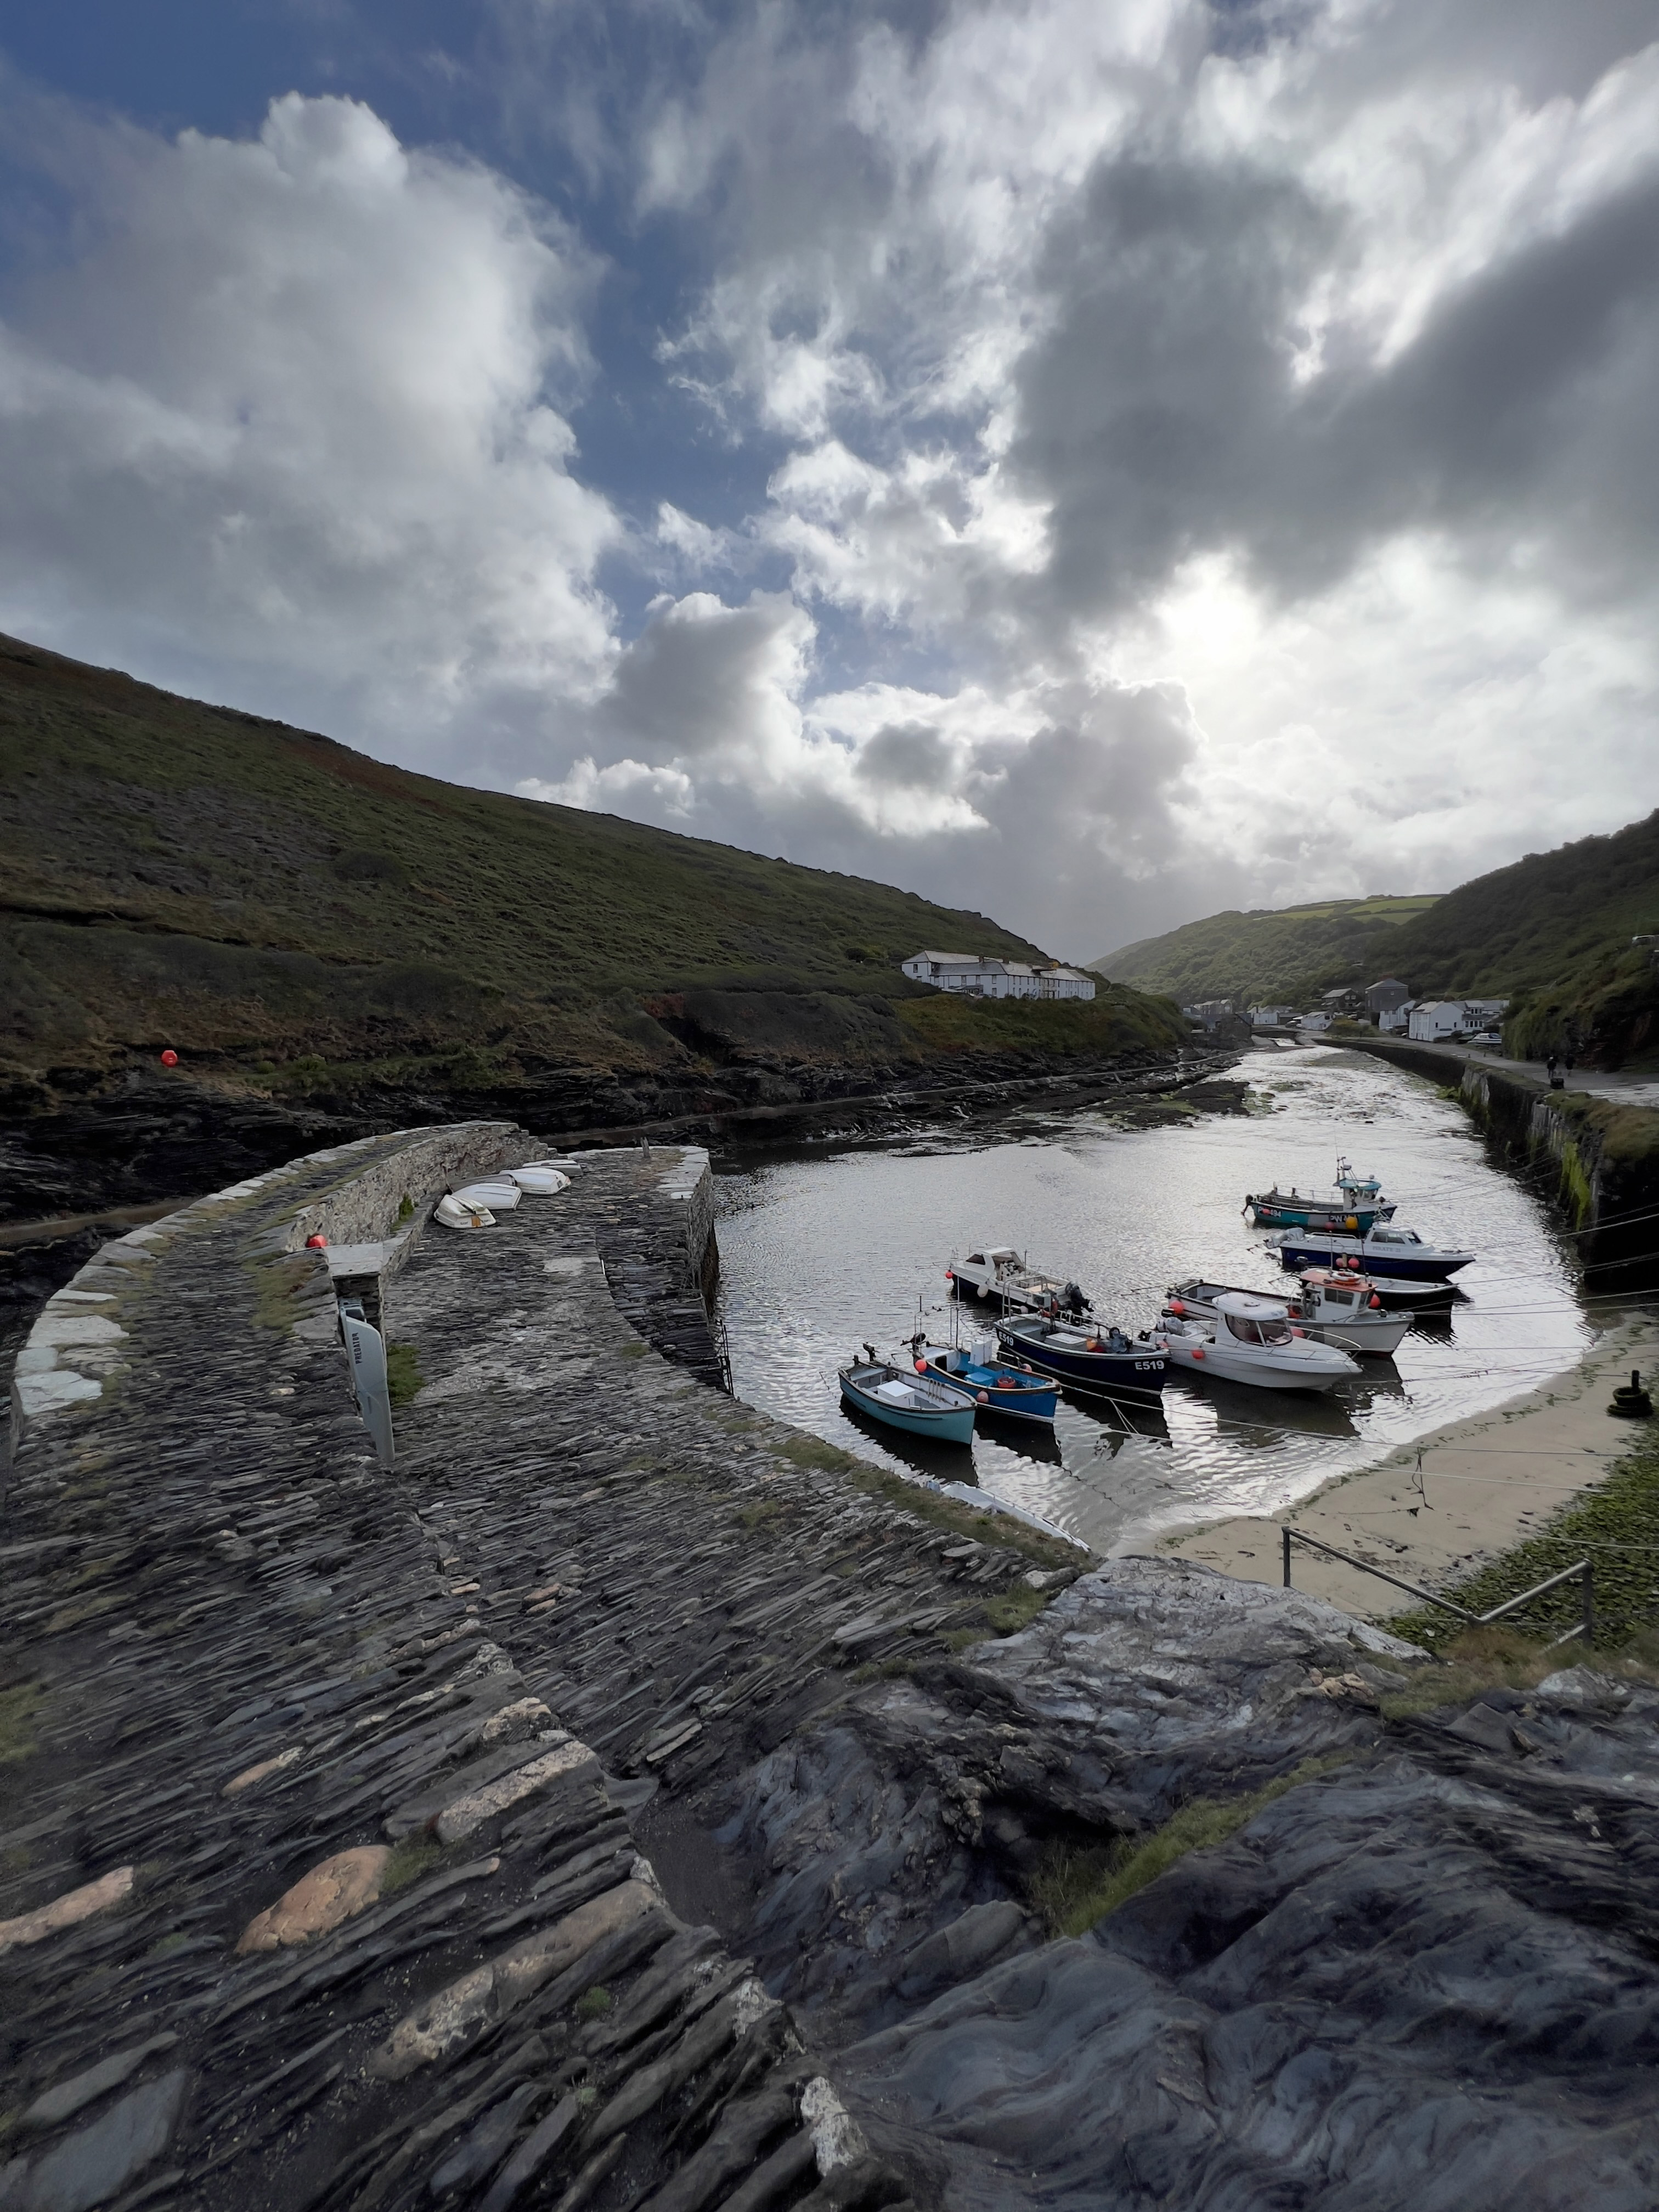
The lighting in this scene was pretty spectacular and it needed the iPhone’s HDR capabilities – but the result just looks a bit gray and flat and there’s no way to switch off the HDR mode on the iPhone(Image credit: Rod Lawton)
The problem is not necessarily the HDR process itself, though, but the way the iPhone processes the HDR image, and that’s something youcanchange.
This is something that only more serious photographers would want to undertake, since you need to swap to a desktop photo editing app, but it does make it possible to exploit the iPhone’s terrific HDR capabilities in a much more controlled and creative way.
1. Shoot RAW
With the RAW option enabled, the iPhone will capture a raw DNG file. The picture will still look exactly the same on the iPhone and in Apple Photos, because Apple is applying its default HDR tone curve to the RAW file just as it would if you had set the camera to shoot JPEG or HEIF images.
The difference is that the RAW data is still there, and it contains a lot of extended dynamic range data.
2. Export the RAW file from Apple Photos (desktop)
Back in Apple Photos on your Mac, you can Export RAW iPhone photos in their original format. They will be saved as DNG files that you can open in other software.
If you did a whole set of shots on your iPhone, you can export them all at once and import them intoLightroomorCapture One. Or you can launchPhotoshopand open these DNG files individually.
>>>616-00651 Battery for Apple iPhone 11Pro Max
3. Change the profile in Lightroom or Photoshop
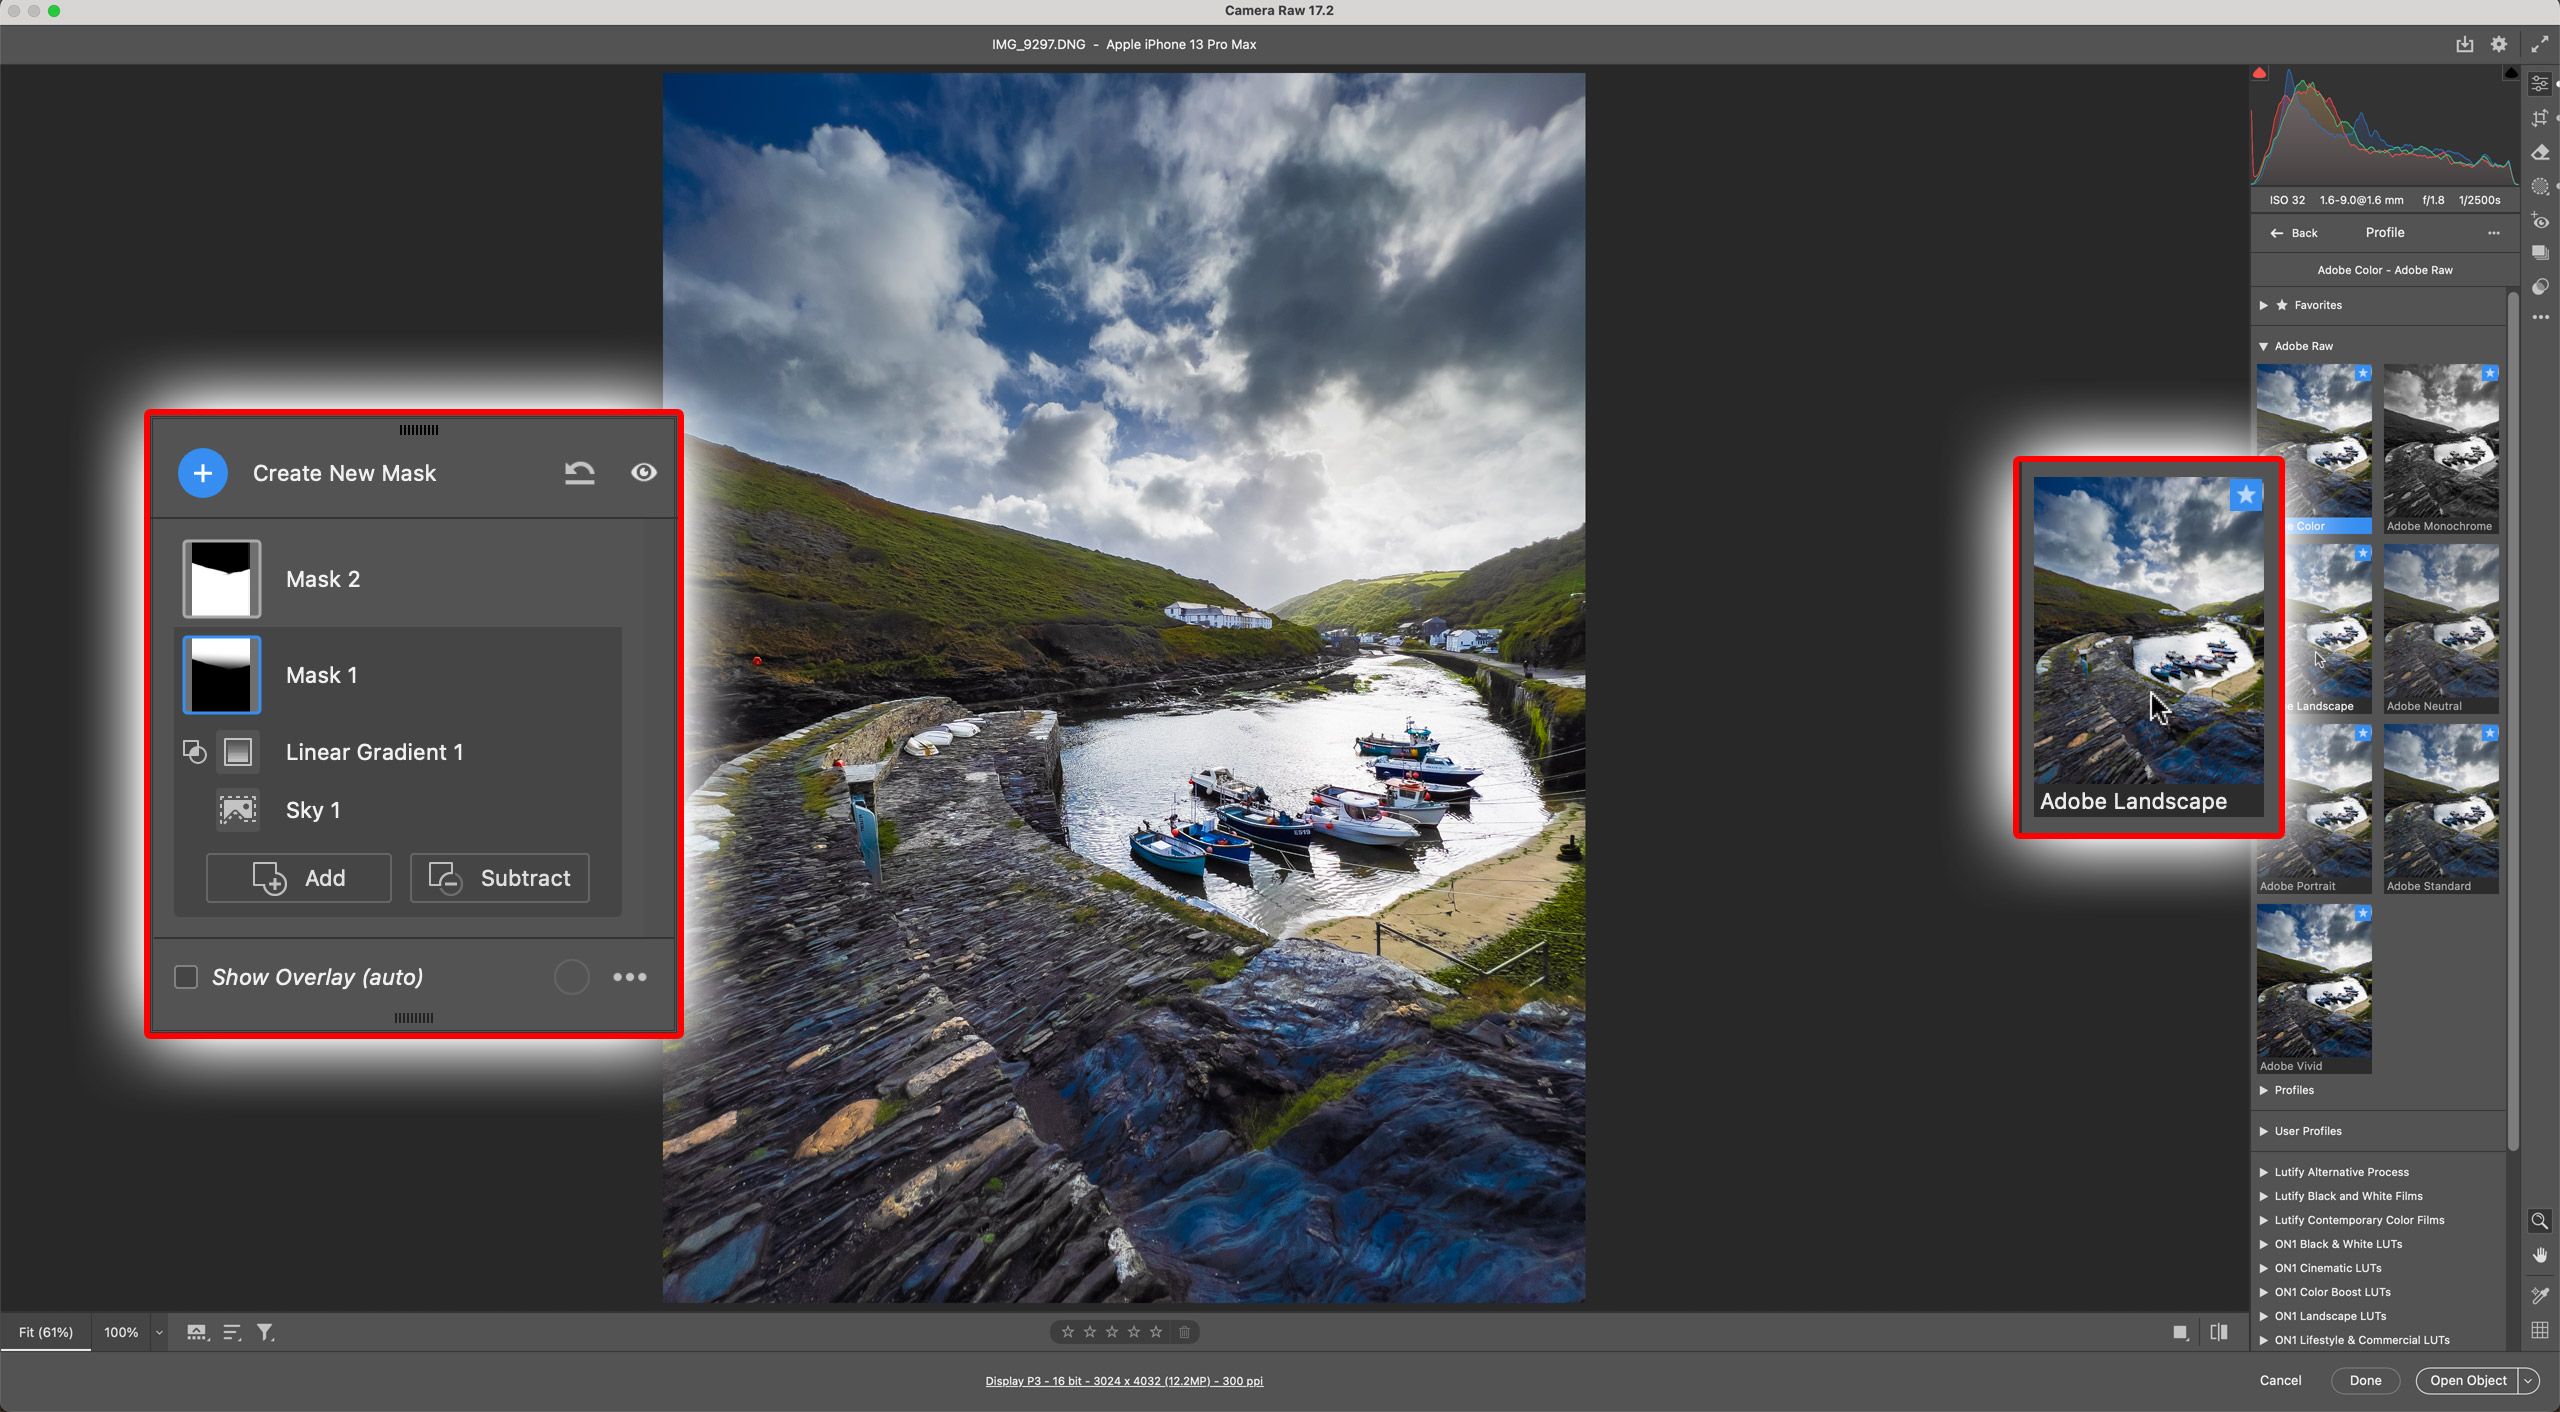
If you open an iPhone’s DNG raw file in Adobe Camera Raw, you can swap to a more interesting profile, like Adobe Landscape, and use AI masking tools to add much more dramatic tones and colors, making full use of the extended dynamic range captured by the iPhone(Image credit: Rod Lawton)
If you use Photoshop, these DNG files will open inAdobeCamera Raw initially, where they will look pretty much as they did on your iPhone. But if you check over in the edit tools in the right sidebar, you’ll see that Adobe has automatically applied its AppleRaw Profile – and you can swap to one of the others to get a completely different look.
For example, if you choose the Adobe Color Profile, it might look like all your extended shadow and highlight detail is gone. In fact, it’s still there and you can use Adobe Camera Raw’s tonal adjustments – or, even more interesting, its masking tools – to bring it all back.
But now you’ve got much more control over the tones and contrast and you’re not stuck with Apple’s own HDR rendering.
So this is not a simple On/Off switch on your iPhone any more, but it is a way to get much better photographic results from the iPhone’s automatic HDR merging and Apple ProRaw files.
It makes the iPhone an even more serious photographic tool than it was before.
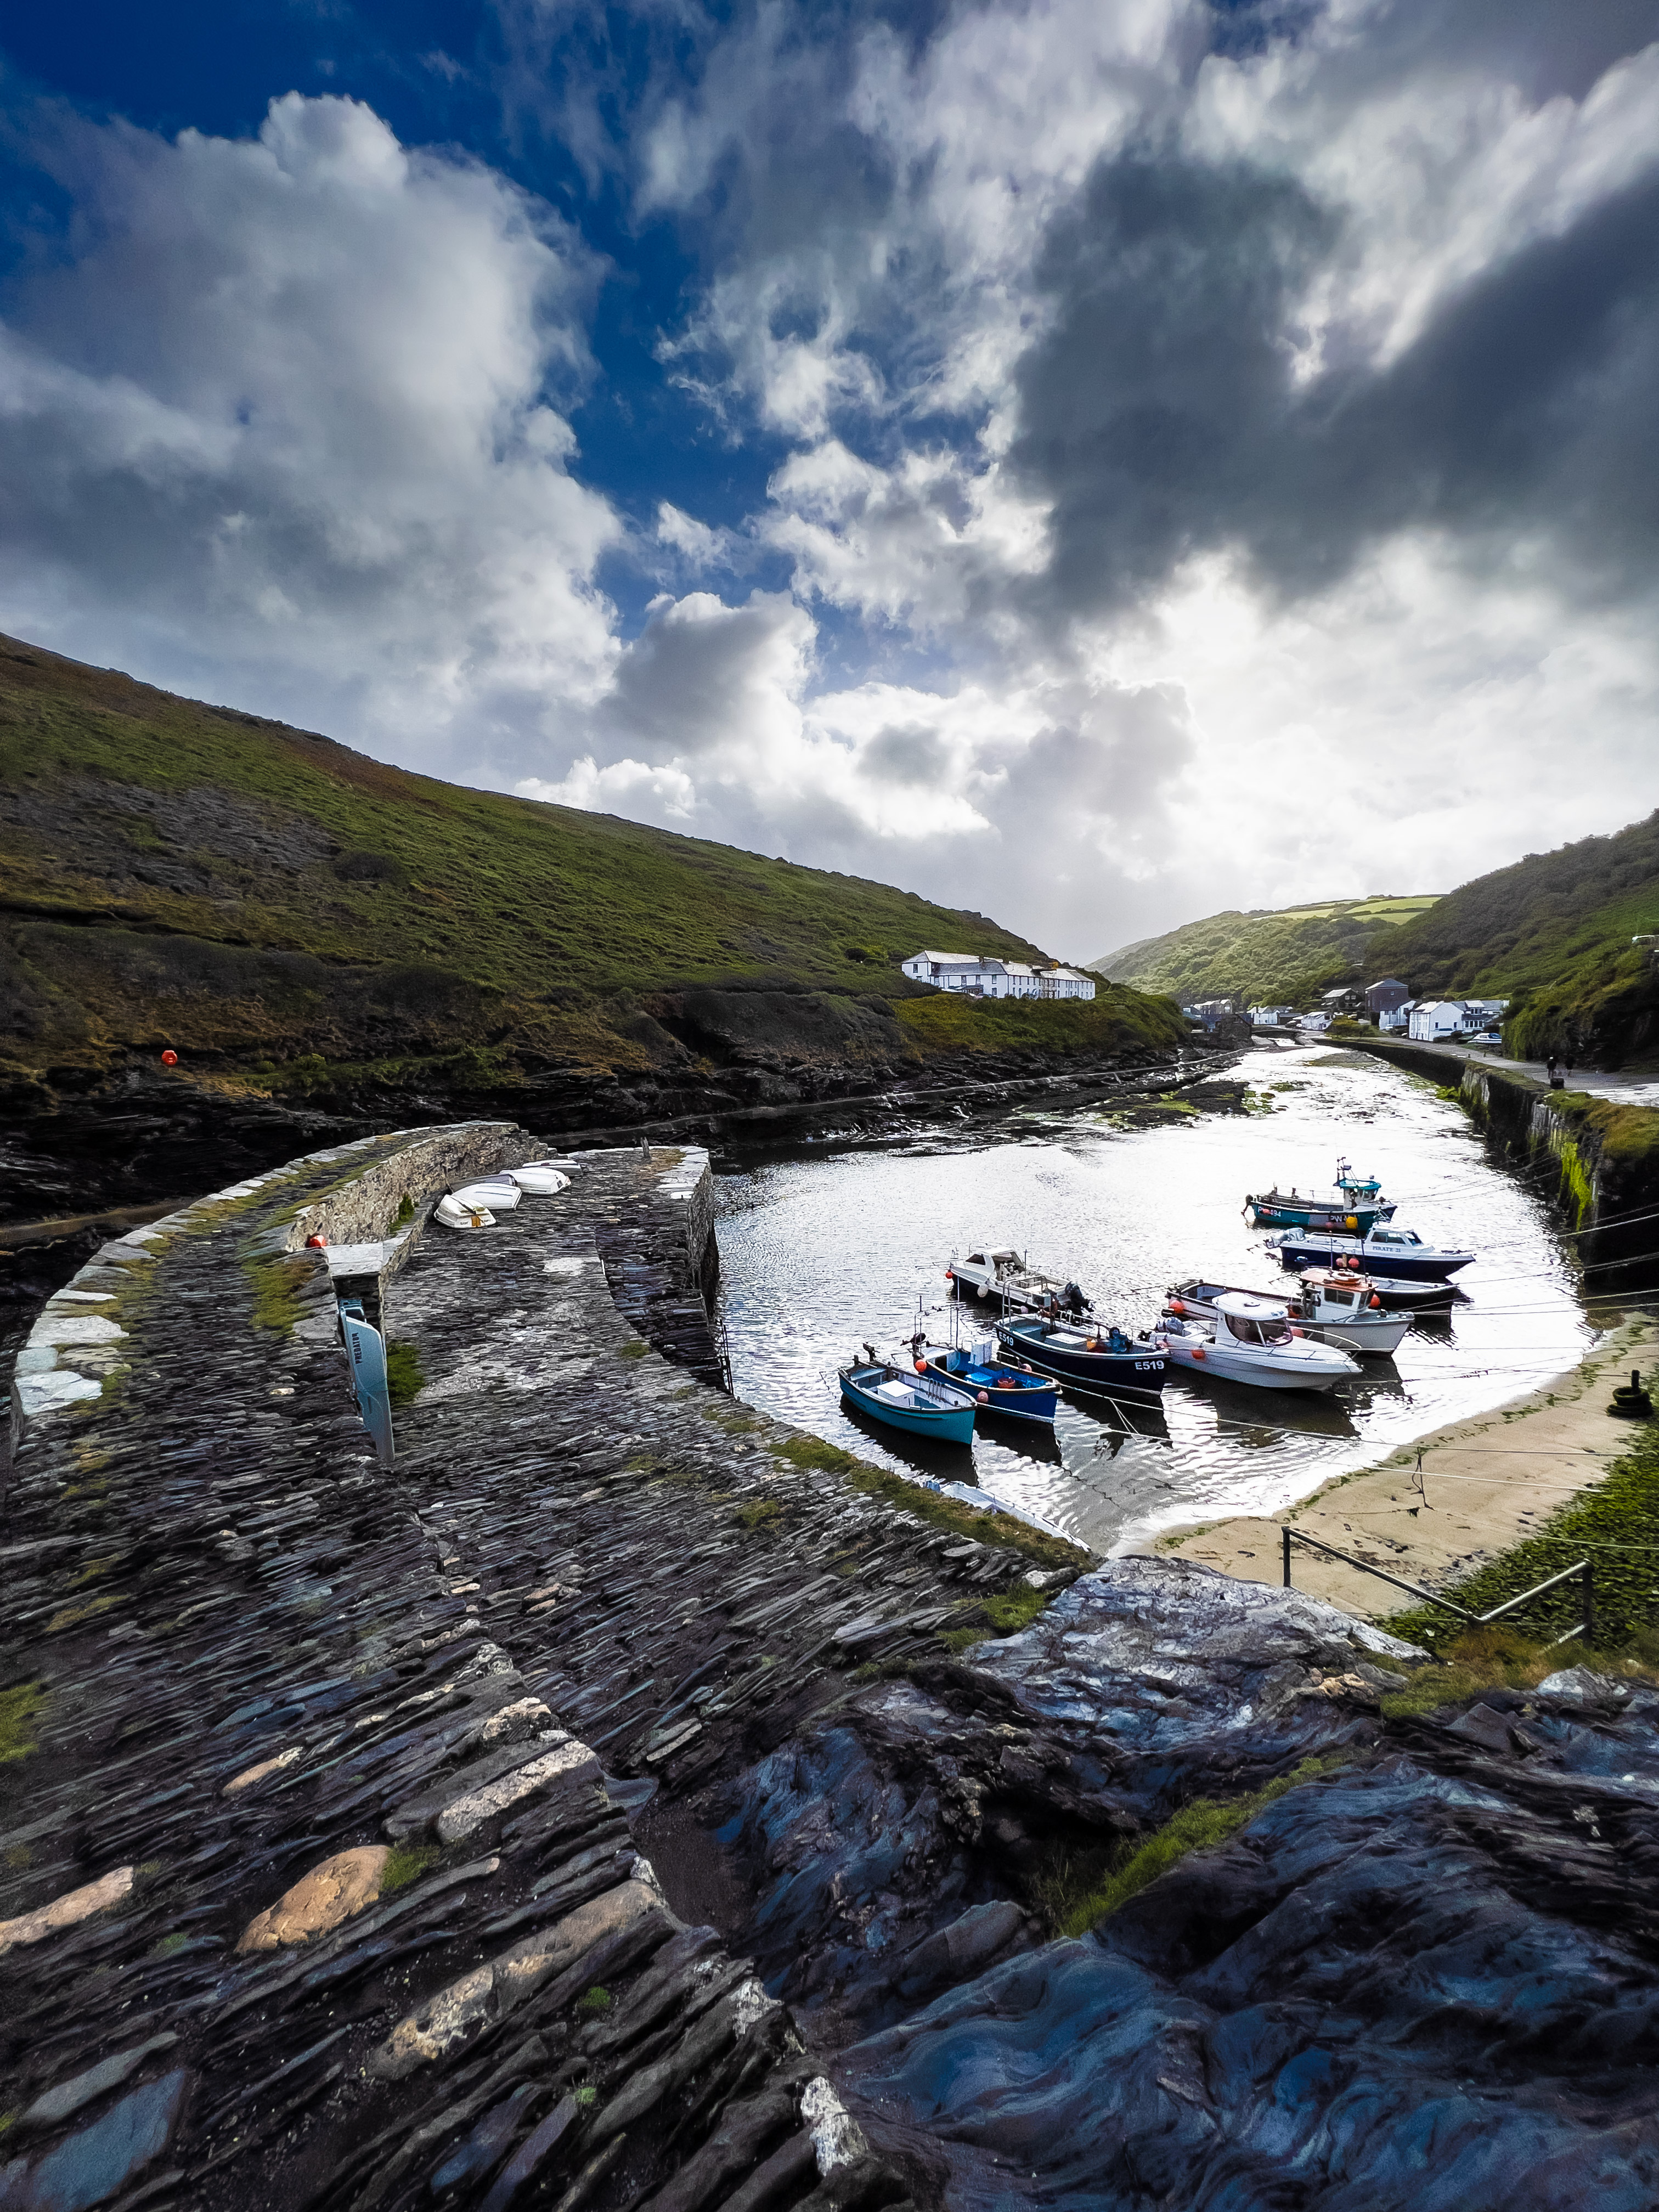
Here’s my finished photo. It shows the huge tonal range the iPhone HDR can capture, and just what you can do with its RAW DNG files in a photo editor(Image credit: Rod Lawton)