We are specialists in quality batteries. We have batteries, chargers and accessories for everything you can think of. Low prices, big inventory, expert advice. Find your battery here!
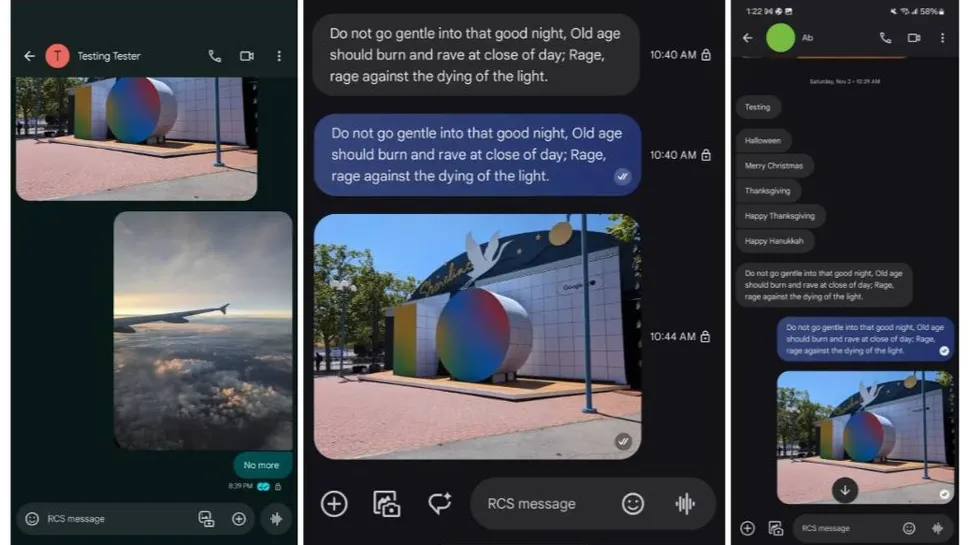
Google is testing even more new features in its Messages beta app
These include an expanded 14-line message view and new RCS message labels
While these are still in beta testing, they could start rolling out to users this month
Over the past couple of months,Googlehas been doubling down on eradicating all traces of Google Assistant to makeGeminiits flagship voice assistant, but amidst the organized Gemini chaos, Google has been paying a lot of attention to improving its Messages app, giving it some much-needed TLC.
It’s safe to say that the new revisions to the Google Messages app have significantly improved its UI. Itsnew snooze function for group chats alsocomes to mind, but Google is still in its beta testing era. For a while, Google was experimenting with aneasier way to join group chats,followingWhatsApp’s footsteps. Now, it’s testing five more features that could make up the next wave of Google Messages upgrades this month.
Although these features are in beta, there’s been no comment on whether they’ll be officially rolling out to users. With that said, we’ll be keeping an eye out for any further updates.
Just a few weeks ago, we reported on a new upgrade found in Google Messages beta indicating thatGoogle would get better at handling lengthy text messages.
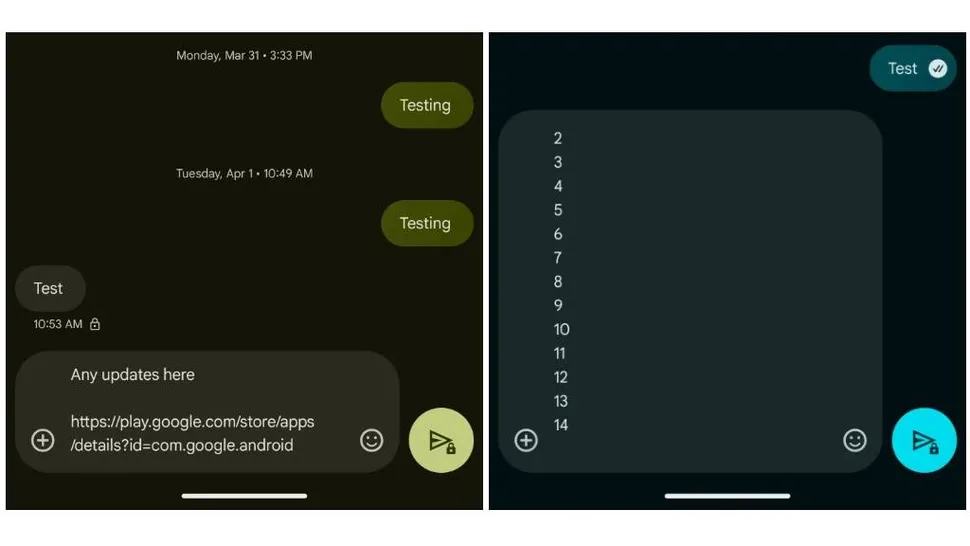
For a while, Google Messages users have been restricted to a four-line view limit when sending texts, meaning that you would need to scroll to review your entire message before sending. This is particularly frustrating when sending long URL links.
But that could soon be a thing of the past, as9to5Googlehas picked up a new beta code that reveals an expanded message composition field on thePixel 9athat now reaches up to 14 lines.
Recently, Google has been testing new in-app labels that could distinguish whether you’re sending an SMS or RCS message.
Thanks to an APK teardown fromAndroid Authority, the labels found in beta suggest that soon you’ll be able to see which of your contacts are using RCS in Messages, adding a new RCS label to the right side of a contact’s name or number.
Unsubscribe from automated texts
This is a feature we’re quite excited to see, and we’re hoping for a wider rollout this month. A few weeks ago, anunsubscribe buttonwas spotted at the bottom of some messages, which could give users an easier way of unsubscribing to automated texts and even the option to report spam.
When you tap this, a list of options will appear asking you for your reasons for unsubscribing, which include ‘not signed up’, ‘too many messages’, and ‘no longer interested’ as well as an option for ‘spam’. If you select one of the first three, a message reading ‘STOP’ will be sent automatically, and you’ll be successfully unsubscribed.
Read receipts gets a new look
(Image credit: 9to5Google)
Google could introduce another revamp of how you can view read receipts in the Messages app. In November 2024, Google tested a redesign of its read receipts that placed the checkmark symbols inside the message bubbles, which used to appear underneath sent messages.
In January, Google tested another small redesign introducing a new white background, which could roll out soon, and while this isn’t a major redesign, it’s effective enough to make read receipts stand out more.
Camera and gallery redesign, and sending ‘original quality’ media
We first noticed that Google Messages was prepping anew photo and video quality upgrade. In March, more users started to notice a wider availability, but it’s still not yet fully rolled out, meaning it could be one of the next new updates in the coming weeks.
Essentially, Google could be rolling out a new option that allows you to send media, such as photos and videos, in their original quality. This will give you the choice of the following two options:
‘Optimize for chat’– sends photos and videos at a faster speed, compromising quality.
‘Original quality’– sends photos and videos as they appear in your phone’s built-in storage.
Everything from .ae to .zw will now redirect to google.com.
REUTERS / Reuters
Googleannouncedtoday that it will no longer be using country code top level domains for searches. Instead, all search services will happen on the google.com URL and local results will be delivered automatically. For example, that means users in the UK will no longer see google.co.uk in their browser’s address bar. Google URLs with those country-specific domain endings will now redirect to the main google.com address.
Google started using location information to automatically provide search results based on geographyin 2017. With that change, it didn’t matter whether you entered a query into a local country code URL or into google.com; you’d always see the results version for the place you were physically located. Today’s announcement seems to take that initial action to its conclusion by sunsetting those ccTLDs.
“It’s important to note that while this update will change what people see in their browser address bar, it won’t affect the way Search works, nor will it change how we handle obligations under national laws,” Google noted in its announcement.
When it comes to HDMI vs DVI cables, which should you get? Our guide reveals all.
(Image credit: Getty Images)
Although the term DVI isn’t probably one that you’ve heard for a while, it’s important to know the difference between HDMI and DVI cables when you’re looking at the best system for video editing, gaming or productivity. Many of thebest monitors for video editing, graphic design and photography, for example, still offer multiple connectivity options, including DVI. With several peripherals littering our desks, all of which need to be hooked up somehow, it’s important to know how this should it be done to achieve optimum results. Often, that comes down to a simple question: do you need an HDMI or DVI cable?
To the untrained eye, it can be a minefield of resolutions, data rates and supported features. Thebest laptops for graphic design, for example, often don’t offer DVI connectivity anymore as frankly it’s an outmoded option, but if you have one of thebest monitors for graphic designor creativity, you’re able to plug in a DVI cable with a simple adaptor. We’ll look at the topic in a bit more detail in this article, and assess whether DVI, as an industry standard connectivity option in the 1990s and 2000s, is still an option you need to have in your arsenal.
The answer depends on more than just the ports on yourbest laptop for video editing. But fear not, our no-nonsense guide lays out exactly why you might need each cable, and which is the best option for creatives right now.
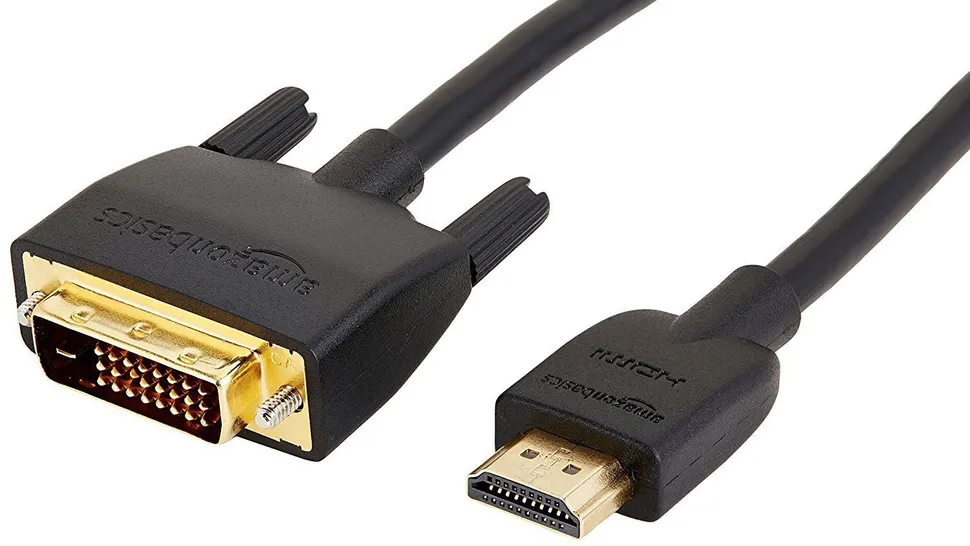
Comparing HDMI and DVI plugs shows the large difference in size between them(Image credit: Rankie)
There’s a large difference in size between HDMI and DVI.
Being the older standard, it’s perhaps unsurprising that DVI is the larger of the two. A typical DVI plug is rectangular in shape, with 24 pins three rows deep making up the bulk of its front side. To the right of this matrix is a square consisting of four more pins. The whole arrangement is flanked on either side by screws that fix it in place. The number of pins, combined with the screws, make DVI a relatively large plug and unlike HDMI, DVI cables can be quite easy to damage. If you bend the pins, plugging them in can be quite a challenge – definitely up there with one of the more frustrating elements of outdated computer hardware.
HDMI is much smaller than DVI and throughout the course of the mid 2000s became the standard for audio and video connectivity. The plug is a slim rectangle with a sloped lip below it and in the middle is a thin gap surrounded by 19 pins. Despite having close to the same number of pins as DVI, HDMI plugs are much more compact, and much easier to plug in largely thanks to the pins being protected and the lack of securing screws, which can get annoying if the rear of your system is hidden against the wall or an obstacle.
To put a spanner in the works, it is possible to get Mini and Micro versions of both DVI and HDMI plugs, and these are generally found on olderApplecomputers such as the originalMacBook Airand 2009 Mac mini. Mini-HDMI and Micro-HDMI can be found on a wider variety of devices, including some tablets and phones, but are still uncommon compared to standard HDMI plugs.
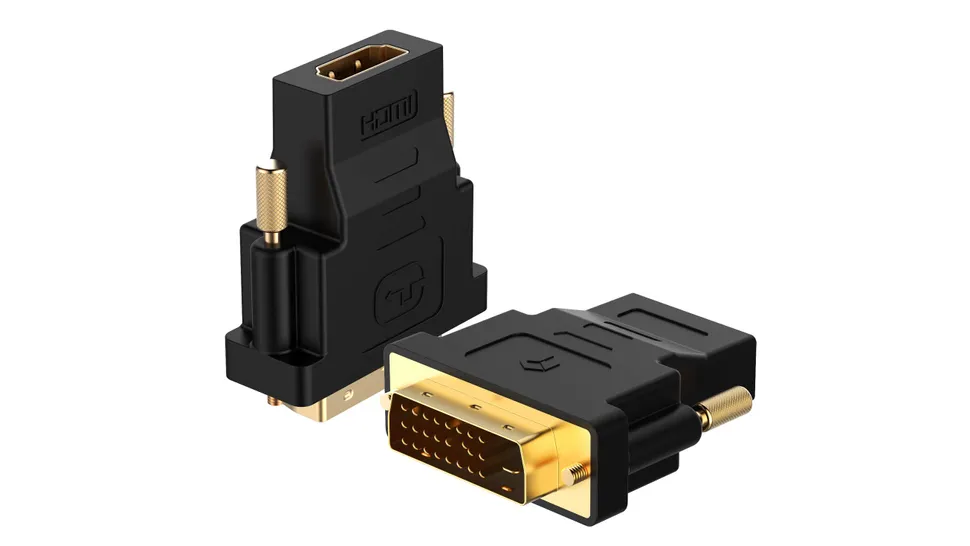
Need to connect HDMI and DVI devices together? Adapters are simple and won’t break the bank(Image credit: Rankie)
There’s a simple solution you can purchase if you need to connect HDMI and DVI devices together. Adaptors generally work well and are very affordable to get hold of.
One of the most important questions when it comes to deciding between HDMI and DVI is what each standard works with and whether it’ll work with your devices. Check the ports on your hardware as many pieces of hardware, including some olderNvidiaand AMD graphics cards, have ports for both but your TV or monitor may only support one or the other. If your monitor is an older model, it will have both options, and any screen from the early to mid 2000s may only feature a DVI, so it’s worth checking what hardware you already have and its requirements if you’re on an older setup but would like to upgrade.
HDMI is much more common than DVI and that’s been the case for the best part of the last two decades, so it’s unlikely you own a screen that doesn’t support it. When it comes to laptops, HDMI’s smaller connector is much more likely to make an appearance due to its space-saving design. You’re also likely to find it on larger computers, TVs, monitors, games consoles and a variety of other hardware types. It’s worth saying however that we’re entering a new generation of connectivity now – where HDMI replaced DVI, we’re now seeing DisplayPort and USB-C eating into HDMI’s market share. Luckily, no matter what hardware you have, adaptors are relatively easy to come by.
Quality
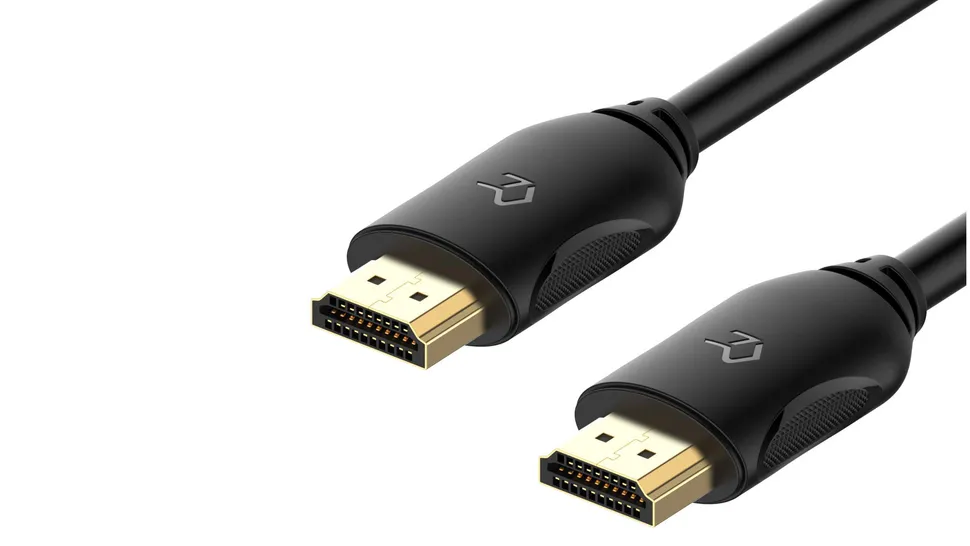
HDMI plugs are far more compact than their DVI equivalents, allowing them to be used in smaller devices(Image credit: Rankie)
HDMI plugs are far more compact than their DVI equivalents, allowing them to be used in smaller devices, but both DVI and HDMI have certain limitations on what they can display both in terms of an output device’s resolution and its refresh rate. Given that HDMI is newer than DVI, it’s unsurprising that it works with better specifications in both cases.
The latest version of HDMI (2.1b) can support a maximum data rate of 48 Gbit/sec and video resolutions up to 10K, which is far more than most people will need. In terms of refresh rate, HDMI can support up to 4K at 144 Hz natively, or a mind-boggling 8K at 60 Hz natively or 120Hz if using Display Stream Compression. It also works with HDR video output (although its maximum resolutions and refresh rates take a slight hit given the increased bandwidth used by HDR video).
DVI only has a maximum data rate of 9.9 Gbit/sec, so taking that into account, the maximum resolution and refresh rate it can support is 3840×2400 at 30 Hz, or 2560×1600 at 60 Hz. It’s likely that if you own an DVI compatible monitor, you’re running on HD at 1920×1080 or less due to the available technology at the time, and with DVI, you’re also likely suffer from a difference in colour rendition as DVI only supports 8-bit RGB colours, whereas you’ll get 12-bit performance in HDMI, so more colours can be rendered natively.
As well as its visual advantages, HDMI can also transfer audio signals, something DVI is unable to do. That means streaming a video from one device to another only requires one cable with HDMI; with DVI, you also need to account for audio cables and associated sockets.
Price
Regardless of whether you need an HDMI or DVI cable, neither is likely to set you back very much. For example, you can pick up anHDMI cableon Amazon for around $5/£5, orDVI cablefor around $7/£7. There are also plenty of adaptors on offer for around the same amount of money that can convert your video signal from DVI to HDMI and vice-versa, meaning outdated monitors can still be used no matter your setup.
It’s worth noting that you may sometimes see expensive versions of each cable doing the rounds, with fancy-sounding features and eye-watering price tags. Even the cheapest HDMI or DVI cable will get your signal to its destination just as fast as the most expensive one, without leaving a galling dent in your finances.
Which should you buy?
Of course this will very much depend on the system and the screens you are using in your setup, but one simple fact can’t be escaped: DVI is an entirely outmoded connectivity option these days and you’ll achieve better results overall from upgrading your setup to factor in more options like HDMI and USB-C.
If you’re looking at motherboards and must choose between one that supports HDMI and one that supports DVI, we’d advise HDMI every time. HDMI is a more modern standard and supports much higher resolutions and refresh rates, and will also work with a wider variety of peripheral devices. To future-proof your setup, we’d recommend a motherboard that hosts the option for USB-C as well as HDMI.
If you have a DVI device that you need to hook up to another device, you can always use anHDMI to DVI cableoran adapter; neither is likely to cost you much more than a fiver. Given that HDMI cables are more modern, more common and often cheaper than their DVI equivalents, there’s no real reason to stick to DVI unless your equipment dictates, but even then we’d recommend looking at some of our guides to help you upgrade to a more modern system.
This is good news for the tech sector as tariff impacts continue.
Amidst the flurry of tariffs imposed by the Trump administration over the last few weeks, we finally have some exemptions that should significantly impact the tech sector. While the initial reciprocal tariffs will remain for imports, U.S. Customs and Border Protection shared some new exemptions on tech-related goods.
The update was announced yesterday evening and follows various tariff increases, particularly on Chinese imports. The exemptions include many products we’re excited to see get some relief. The complete list is available in theofficial bulletin,but it includes computers, smartphones, semiconductor chips, and other tech goods like flat panel TVs, solar cells, and flash drives.
The most recent tariff increase from Trump was 145% on Chinese goods. This sent waves across the tech industry, as many realized the significant impact it would have on many tech products that we rely on, including laptops, desktops, CPUs, semiconductor chips, and any PC component. Large companies like Apple, HP, Dell, and more preemptively imported extra stock before the tariff announcement to skirt some of the impact.
These exemptions should benefit industry leaders and consumers alike, who have been anticipating serious price hikes on imported products. This should offset the price increases for customers and manufacturers who rely on imports for construction materials.
The United States imports around66% ofits tech goodsfrom China, which caused significant concern when tariffs were first announced and subsequently raised on Chinese imports. We recently reported expectations that consoles, monitors, and laptops would be among the most impacted.
Many tariffs initially imposed on April 5th will be reduced for 90 days, but tariffs on China havecontinued to increase. This exemption list is the first we’ve seen concerning the tariff situation with China. That said, tariffs will remain in place for all other imports not included in the exemption list.
The situation is subject to change, but we’ll report any significant updates on the tariff situation as things progress, so be sure to check back regularly for more information.
The U.S. just called a 90-day truce on the global trade war, but it’s escalating the situation with China.
(Image credit: FOX 5 New York / YouTube)
Just as the second round of his announced tariffs began to take effect, President Trump said he would delay their full implementation for many countries for 90 days. However, because China retaliated against the 104% tariff on its goods by applying 84% import duties on American goods, the White House is firing back by pushing the China levy back to 125%. This pause will apply to the 75 countries that have reciprocal tariffs applied against them but have not announced any retaliation against the planned higher tariff rates. However, a 10% tariff applied to all imports remains for those countries during the pause.
This news has allowed the market to recover a bit, with a few tech companies rebounding fromhitting their record lows. The 90-day period will also hopefully be enough time for many countries to negotiate a deal with the White House so that global trade can return to normal. However, the U.S.’s actions against Chinese trade are the latest in a series of moves escalating the trade war between the two countries.
Trump first applied a 20% tariff on Chinese goods in February, alongside the 25% taxes on Canada and Mexico. This jumped to 54% when he announced additional import duties in early April. Because of this,Beijing put a 34% levy on American productsandrestricted the export of several rare earth metals.
Trump responded with an additional 50% tax on the already existing 54%, pushing tariffs to 104%. Because of this, China retaliated with its own 50% increase, pushingimport taxes on American goods to 84%. This did not end there, though, as the latest Truth Social post by Trump says that he will push taxes on Chinese imports to 125%.
He made this announcement in the early afternoon in the U.S., which is just beyond midnight in Beijing. So, we’ll have to wait a few hours to see how China will react to this news.
It seems that the tariffs that Trump announced are meant to bring the rest of the world to the negotiating table, with Commerce Secretary Howard Lutnick posting on X (formerly Twitter), “The world is ready to work with President Trump to fix global trade, and China has chosen the opposite direction.”
Incidentally, the E.U. just applied its own retaliatory tariffs on the U.S. a few hours before the announcement. However, this will not take effect until next week, so we don’t know if it will retract these levies or if Trump will also punish Europe with more taxes if it does not change its direction.
Double tap to turn a page or recap your previous read
Ever gotten so lost in a book series that you don’t remember a particular character’s arc or the ending of the last novel? Thanks to an AI-automated summary feature for Kindle devices, you’ll be back on track in no time.
Simply known as Recaps, the new feature acts like a “Previously on…” television segment, giving readers a quick refresher on storylines and characters before reading the next book in a series. This feature, however, is only available for books borrowed (aka via Prime Reading or Kindle Unlimited) or purchased from the Kindle Store and, of course, across ebooks in a series.
Users can access the new feature by downloading the 5.18.1 update on a 10th-gen or newer Kindle device. Once updated, readers should look for the “View Recaps” button in the series page in the Kindle Library or the “View Recaps” item within the series grouping three-dot menu. If the “View Recaps” button isn’t available, the feature is inaccessible for that series.
Tap, tap the side to turn
Another great feature included in the latest software update is Double Tap to Page Turn. As the name suggests, the feature can be switched on in Kindle settings, and instead of pressing the screen, users can double-tap the Kindle’s frame to turn a page or scroll down (i.e. on the Home or Library screen).
This is a fantastic new addition that makes Kindles with no physical page-turn buttons easier to use in one hand. There’s one disadvantage though: you can only move forward with double taps when reading, and users will have to rely on the usual screen taps to go back.
Both of these features are a real page turner for Kindle users, as they allow forgetful readers (like me) to recap a previous book or flip through pages without smudging the device’s screen. So far, Double Tap is available globally, whereas Recaps has only rolled out on Kindle devices in the US and on the iOS app.Amazonhas not confirmed when it will be accessible for readers globally.
While the company’s press release doesn’t explicitly mention the use of AI in Kindle’s new feature, it has been confirmed in a statement toTechCrunch. As per an Amazon spokesperson, “we use technology, including GenAI and Amazon moderators, to create short recaps of books that accurately reflect book content”.
This isn’t Amazon’s only foray into using AI across its devices. TheKindle Scribes have AI summariesand handwriting recognition, while Ring cameras recently introduced aSmart Video Searchfor premium subscribers, using text-to-image prompts to scour saved footage.
Readers have raised some red flags onRedditabout these AI-powered features, with concerns about recap accuracy and how Amazon plans to ensure that moderator checks are actually completed. The company claims recaps do accurately reflect content, but we have reached out for verification of these processes. We’ll keep you updated on how this narrative pans out.
Learn what CAD is how it’s used in architecture, engineering and product design.
(Image credit: Laurence Dutton via Getty Images)
What is CAD? you might be wondering if you’re considering a career in architecture, engineering or product design. Jobs in these areas often require skills in computer-aided design as a requisite, but what is CAD exactly, how does it work, and how do you learn it?
Since we specialise in news and reviews on a wide range of creative sectors, we’ve reviewed a lot of CAD software over the years, and we’ve spoken to users who contribute features and tutorials to the site. In this guide, we’ll provide a basic overview of everything you need to know about CAD to get started. From here, you might want to check our guide to thebest laptops for CAD and AutoCAD.
What is CAD?
(Image credit: Laurence Dutton via Getty Images)
CAD stands for computer-aided design, although you may also hear the earlier term computer-aided drafting, or a combination: computer-aided design and drafting (CADD). These might sound like quite broad concepts, and they are. CAD can refer to any use of computers to help the design process, but there are two main types: 2D CAD and 3D CAD.
CAD is used to create, modify, test and analyse or optimise design in a wide range of areas, from designing skyscrapers to tiny machine parts.
In the past, designs were drafted by hand using pencil on paper. CAD emerged in the 1960s and have shaped how designers work by replacing drawing boards, protractors and T-squares with specialist computer programs.
These programs allow users to efficiently create virtual replicas of physical artifacts to test and iterate on them and then produce electronic files for print, machining or other forms of manufacturing. These can take the form of 2D blueprints or 3D models.
What is CAD used for?
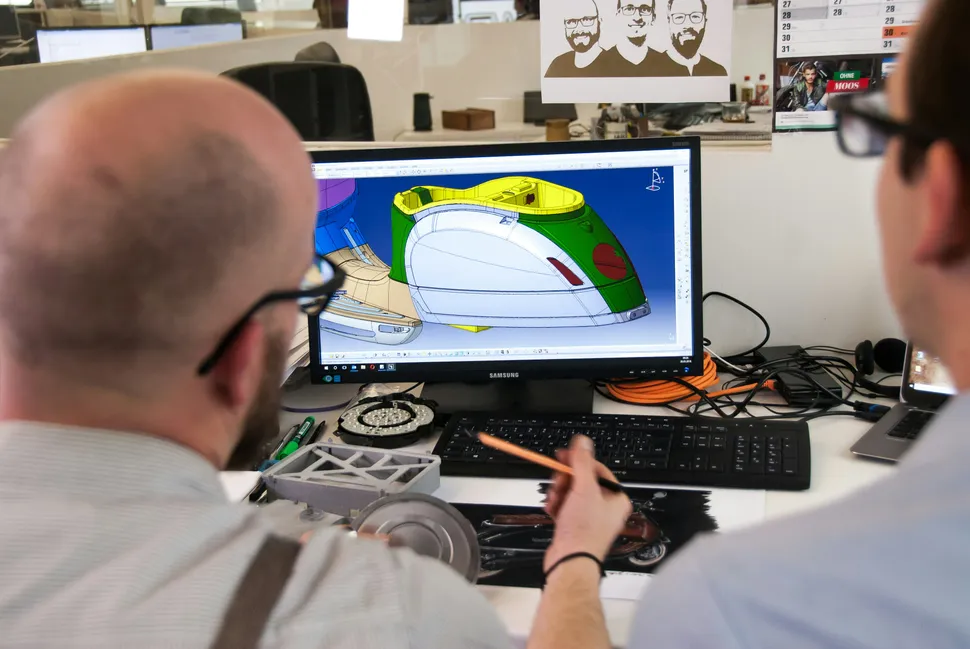
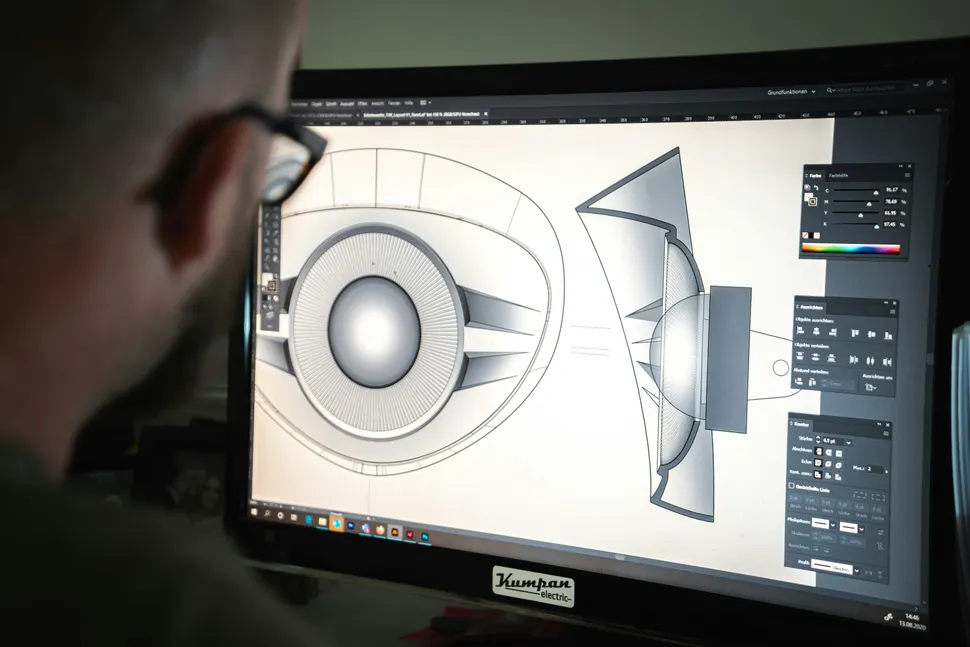
(Image credit: Kumpan Electric via Unsplash)
CAD is used in a wide range of industries, from architecture and product design to aerospace, automobile design, electrical engineering and life sciences. As a result, people entering these areas will often be expected to have CAD skills.
Within these fields, CAD tools are used for everything from concept development and creating mockups and visual prototypes to the detailed design of components, analysis and optimisation, creating guidelines and instructions, rendering and animation.
How does CAD work?
CAD programs allow designers to visualise designs, simulate performance to test them for stress, material strength and then make adjustments and iterate.
The process and workflows used vary across different industries and depend on the type of CAD used. Architects use CAD to envision real-world buildings in a virtual environment, first through conceptual sketches to detailed blueprints.
By using CAD programs, architects can experiment with designs, layouts and materials and check that their choices meet the desired aesthetics as well as practical needs for a given site.
CAD has a lot of benefits compared to hand-drawing. It allows virtual prototyping, the creation of complex geometry and assemblies and precise virtual analysis of properties, tolerance and kinematics. CAD programs can also be used to create photorealistic product renders.
Since they allow users to simulate performance, CAD programs make it easier to test things and ensure components fit a project before going to production, improving efficiency and accuracy. Designs made using CAD software can also help protect products concepts by providing documentation for patent applications, and they can speed up time to market.
Using CAD software increases productivity too since programs are optimised to speed up workflows and automate repetitive tasks. Settings can be adjusted to different industry standards, and parts of drawings can be reused in others. CAD can also improve communication among team members and partners by producing neat drawings and clear documentation and databases, and CAD data can be used to extract machine codes for computer-aided manufacturing (CAM).
We have a dedicated guide to the types of CAD, but basically there are two main types of CAD: 2D and 3D.
2D CAD models are flat technical drawings providing information such as structural details and dimensions. This can include floor plans for buildings and blueprints for the manufacture or reproduction of objects.
3D CAD models provide virtual models of objects in all dimensions and can also show how they operate and fit together with other objects. These are using in mechanics, manufacturing and car design and more.
If you’re considering a career in a field where CAD is used, you may be wondering how long it takes to learn CAD and whether you can learn CAD on your own.
Most people learn CAD through a combination of formal online or in-person courses, tutorials, and practical exercises. If you want to learn CAD on your own for free, there are lots of tutorials online. It will probably be best to start by choosing the software program that’s most used in your industry and following online tutorials and practice projects and joining online communities dedicated to that specific program.
Experts suggest that it’s possible to learn the basics of CAD with about 20 hours of tuition and up to around 100 hours of practicing. If you don’t already have drawing skills, you may want to start there an first master the basics of 2D drawing and then 3D. You’ll also need to be familiar with basic mathematical and geometrical concepts.
If you are looking for somewhere accessible to start, TinkerCADis free and relatively simple. It runs in your browser and has built-in tutorials.
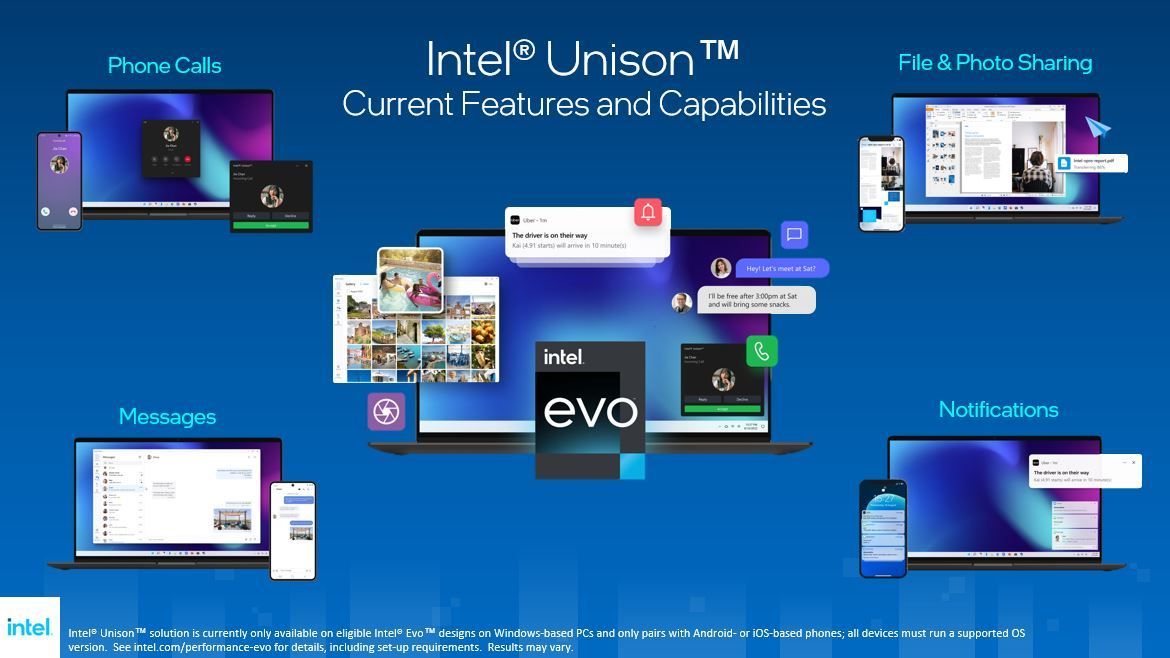
Since Apple connected its PCs with smartphones and tablets using its MacOS and iOS operating systems to provide a seamless user experience some 10 to 15 years ago, multiple attempts have been made to replicate similar capabilities with Windows-based PCs. One such attempt is Intel’s Unison app, which was released in early 2022 and will be discontinued this June, reportsNeowin.
“Intel Unison will soon be discontinued,” reads a statement by Intel in Apple’s AppStore,Google’s PlayStore, andMicrosoft’s Store. “The first step in its wind-down process is ending service for most platforms at the end of June 2025. Lenovo Aura platforms will retain service through 2025.”
Intel’s Unison allows users to make phone calls, send text messages, get notifications, and transfer files and photos between Android and iOS handsets andWindows 11PCs. The app is a part of Intel’s Evo program to improve the user experience with premium Windows 11 PCs running its 12th-Gen Core processors or newer. However, the company no longer sees the app as one of its competitive advantages.
Intel did not disclose why it decided to discontinue its Unison app. Perhaps this is a part of the company’s broader cost-cutting strategy, and if so, we could see Intel dropping support for other software efforts in the coming months. Recently, Lip-Bu Tan, Intel’s new chief executive, said that the company planned to can or spin off operations that no longer fit its core strategy, and apps like Unison barely do. While it certainly improves the user experience with Intel-based PCs, it is not an exclusive app, and maintaining a large fleet of software costs money that Intel wants to preserve for developing its core products.
This is perhaps because Intel’s Unison is not a unique app, as multiple programs connect smartphones with Windows PCs. Microsoft offers Phone Link, and Samsung has its own version called Flow.Dellhas tried to offer its own Mobile Connect app, but it did not work flawlessly with iPhones, so it discontinued it somewhere along the line, clearing the road for Intel’s Unison and Microsoft’s Phone Link. Although Intel’s Unison could be a fine app, Microsoft’s Phone Link has better compatibility as it works with virtually all PCs running Windows 10.
Intel’s Kevin O’Buckley, Senior Vice President of Foundry Services, announces progress on the company’s 18A process node on stage at the Vision 2025 conference.
At its Vision 2025 conference, Intel announced today that it has entered risk production of its 18A process node, a crucial production milestone signifying that the node is now in the early stages of low-volume test manufacturing runs.
Intel’s Kevin O’Buckley, the Senior Vice President of Foundry Services, made the announcement as Intel nears the full completion of its “five nodes in four years” (5N4Y) plan, which was originally set in motion by ex-CEO Pat Gelsinger as part of the company’s quest to retake the semiconductor crown from rival TSMC. The conference also marks the first time thatnew CEO Lip-Bu Tanhas taken to the stage as the new leader of Intel.
Intel originally announced itsfour-year planin June 2021, and despitecanceling high volume manufacturing of the 20A nodeas a cost-cutting measure, Intel is on the cusp of reaching the finish line with its 18A node. Notably, Intel’s 5N4Y plan hinged on the process nodes beingavailablefor production rather than actively being in the final high volume manufacturing (HVM) stage.
“Risk production, while it sounds scary, is actually an industry standard terminology, and the importance of risk production is we’ve gotten the technology to a point where we’re freezing it,” O’Buckley explained. “Our customers have validated that, ‘Yep, 18 A is good enough for my product.’ And we have to now do the ‘risk’ part, which is to scale it from making hundreds of units per day to thousands, tens of thousands, and then hundreds of thousands. So risk production [..] is scaling our manufacturing up and ensuring that we can meet not just the capabilities of the technology, but the capabilities at scale.”
Risk production is one of many steps on the long road to fielding a new process node and indicates that the company believes the node is nearly ready for HVM. Intel has already produced plenty of 18A test chips/shuttles, typically wherein multiple different designs are prototyped on a single wafer.
In contrast, risk production consists of pressing wafers full of a single chip design into low-volume manufacturing as the company tweaks its manufacturing flow and qualifies the node and Process Design Kit (PDK) in real-world production runs. Intel will then scale production up to higher levels in the second half of the year. This step of bringing up a semiconductor process comes after the R&D, design, and prototyping stages of development.
There is some ‘risk’ to risk production, though, as yields and functionality (parametric yields, etc.) can be sub-par as the company refines its manufacturing techniques and optimizes its tooling as it works up the learning curve. As such, customers typically use risk production to manufacture qualification or engineering samples, and the customers aren’t given as stringent yield targets/guarantees as they are with nodes fully qualified for HVM.
However, some customers are willing to assume those risks to get the payoff of gaining significant time-to-market advantages through early access to the node, which then allows them to adjust and perfect their designs before competitors even begin production.
Intel hasn’t yet specified if the 18A risk production is for its own Panther Lake processors, which it says will arrive on schedule later this year, or if the production runs are for its external foundry customers. However, Panther Lake, Intel’s first 18A processors, will enter mass production later this year. As such, the Panther Lake chips are likely the risk production subject; this schedule generally aligns with our expectations for a typical risk production-to-HVM timeline for Intel.
Although Intel pioneered several new technologies on its cancelled 20A node, the 18A (1.8nm) chips will be the first productized chips with bothPowerVia backside power deliveryandRibbonFETgate-all-around (GAA) transistors. PowerVia provides optimized power routing to improve performance and transistor density, and RibbonFET also provides better transistor density along with faster transistor switching, but in a smaller area.
>>>GH5AD-03-17-4S1P-0 Battery for Intel NUC23 X15 AC57 X15 LAPAC71H Intel also continues to work on its broaderfoundry roadmap, which includes the follow-on 14A node, Intel’s first to utilize High-NA EUV lithography. Numerous node extensions to other nodes will further expand Intel Foundry Services’ portfolio to a broader range of applications.
These developments come during turbulence at Intel Foundry as the company adjusts to changing macroeconomic factors. Intel recentlydelayed the build-out of its Ohio operations until 2030, for example. However, the announcement of 18A risk production mirrors the positive reports that Intel is running itsfirst 18A wafers through its Arizona fabs.
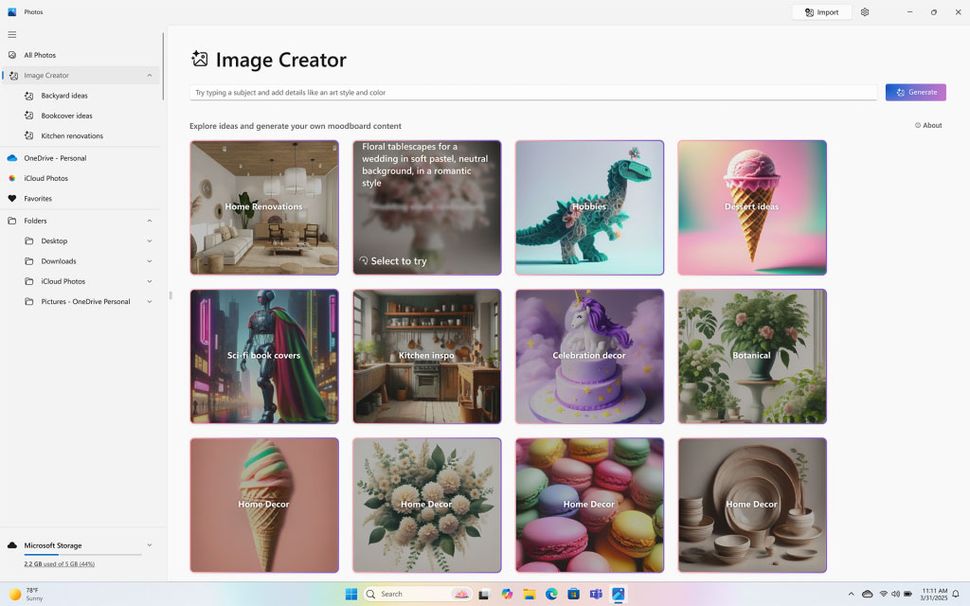
AMD Ryzen AI 300 series and Intel Core Ultra 200V PCs are getting Live Captions, Cocreator, Restyle Image, and Image Creator.
(Image credit: Microsoft)
Microsofthas announced that severalWindows 11Copilot+ AI features aregraduatingfrom Snapdragon X exclusivity toAMD Ryzen AI 300 seriesandIntel Core Ultra 200VPCs. On Monday it began its expanded roll-out of features like Live Captions, Cocreator, Restyle Image, and Image Creator – so they will be available on modern AMD and Intel systems, as well as PCs packingQualcomm Snapdragon X(SDX) series processors.
Live Captions will also translate from 27 languages into Simplified Chinese(Image credit: Microsoft)
One of the most welcome additions to Windows 11 for those embraced by the expanded Copilot+ feature compatibility is probably Live Captions. Microsoft says that this feature “offers real-time translations in English for audio and video content during virtual meetings, podcasts, or video playback.” This feature, which Microsoft claims can live translate from 40 languages to English, has been around a while for SDX PCs, and is “coming soon” for those with a Ryzen AI 300 or Ultra 200V PC.
Another new Copilot+ addition which Microsoft characterizes as an accessibility feature is rolling out to Qualcomm SDX machines soon. Voice Access delivers better descriptive and flexible language interaction with Windows. AMD and Intel system owners with NPUs will have to wait until “later this year” for this one, though.
Cocreator in Paint is now ready for modern AMD and Intel processor owners. Here, Microsoft’s AI can help you create imagery from prompts or analyzing and improving on your badly drawn scrawl.
With Copilot+ smarts introduced to Microsoft’s Photos app, Windows 11 users with the requisite AMD and Intel chips get two ‘AI’ features to play with. Restyle Image is an AI-driven photo-filter style feature which can make existing works look something like an oil painting, sketch, or so on. Image Creator does what it says from your simple, or complex, text prompts.
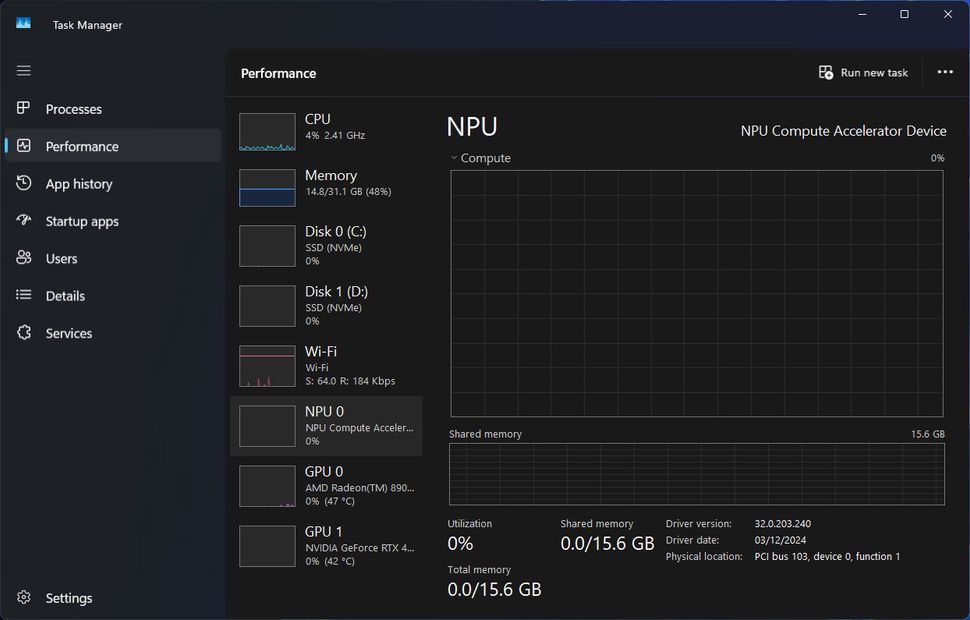
Give your idle NPU something to do(Image credit: Future)
March non-security preview release update is required, for now
Microsoft says to make sure you switch on ‘Get the latest updates as soon as they’re available’ in your updates control panel. If you are eager to try some of the features outlined above, that unfortunately means opting to install the March non-securitypreview release. You must also ensure the host apps (Paint, Photos etc) are up-to-date via the Microsoft Store. Remember, the expanded feature rollout availability will also vary based on your location and language selection.
Considering x86 PCs withNPU-packing processors have been available for months, Microsoft has been rather tardy in breaking its most attractive Copilot+ features out from their Qualcomm-only rut. According to our editor-in-chief, you all haven’t been missing much, though. Not long after launch, the Copilot+ featureswere judgedto be “a bad joke.” Moreover, the much heralded Recall feature remainsin (re)developmentafter all the security and privacy concerns that were raised.

 (Image credit: 9to5Google)