Choosing Between S25 Plus and S25 Ultra
When comparing Samsung’s latest flagship phones, many buyers in New Zealand often struggle between two closely positioned models. The discussion usually starts with s25 plus vs s25 ultra size, then moves into performance differences and quickly focuses on s25 ultra vs s25 plus camera. On top of that, price expectations and value for money make the decision even harder, especially when users search for s25 plus vs s25 ultra price. A final common question is samsung s25 vs s25 ultra which is better, since both devices appear powerful on paper but serve slightly different user needs.
Camera Differences Between S25 Plus and S25 Ultra
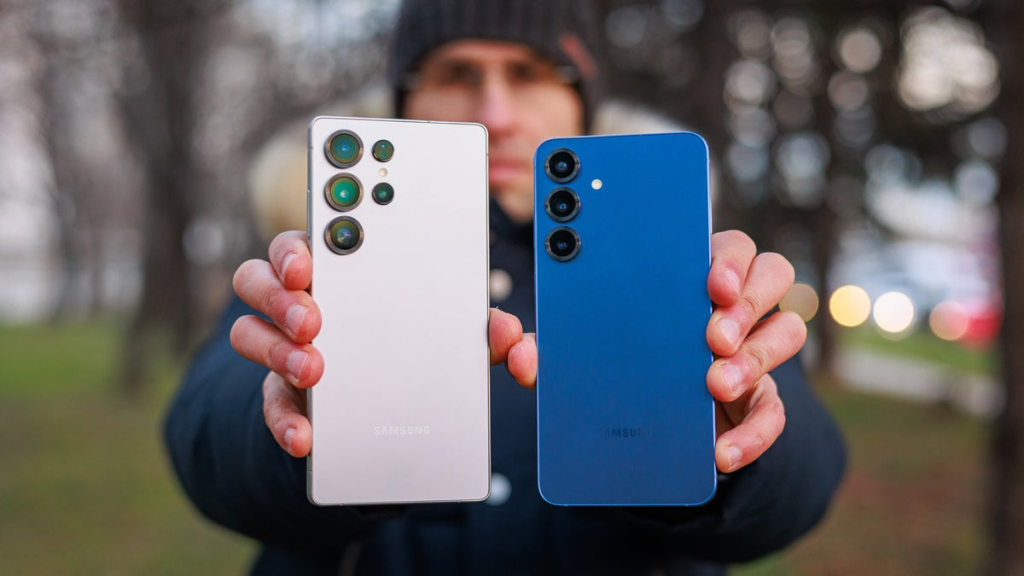
The biggest distinction comes from photography capabilities, which is why s25 ultra vs s25 plus camera is one of the most searched comparisons. The Ultra model is designed for users who want maximum camera flexibility, especially in zoom range, low light performance, and detail clarity. It is more suitable for capturing landscapes, city night scenes, and distant subjects with higher precision.
The Plus model still delivers strong camera performance for everyday use. It handles social media photos, video calls, and casual travel photography very well. However, when lighting becomes challenging or when zoom is required, the Ultra shows a clear advantage due to its more advanced imaging system and processing power. For users in New Zealand who enjoy outdoor photography, hiking, or travel content creation, this difference becomes more noticeable.
Price Comparison Between S25 Plus and S25 Ultra
Another major factor is s25 plus vs s25 ultra price, which often determines the final purchase decision. The Plus model is positioned as the more affordable flagship option, offering most premium features at a lower cost. It is designed for users who want high performance without paying the highest tier price.
The Ultra model is significantly more expensive, reflecting its upgraded camera system, larger storage options, and additional productivity features. For many buyers, especially those who prioritize budget control, the price gap is an important consideration. In New Zealand, where flagship phones are already a major investment, the Plus model often feels like a more balanced financial choice.
Size and Design Differences Between S25 Plus and S25 Ultra
The topic s25 plus vs s25 ultra size plays a big role in daily usability. The Plus model is generally lighter and more compact, making it easier to hold with one hand and more convenient for pocket carry. This makes it appealing for users who commute or prefer simple daily handling.
The Ultra model is larger and heavier, but this size brings advantages. The bigger screen improves multitasking, video viewing, and productivity tasks. It is also more comfortable for users who frequently edit documents, watch content, or use split screen features. While less portable, it provides a more immersive experience for power users.
Performance Battery and Everyday Use
Both devices deliver strong performance, with fast processors and smooth user experiences. In daily tasks like browsing, messaging, gaming, and video streaming, both phones feel very similar. However, the Ultra usually maintains higher stability during extended heavy usage such as long gaming sessions or professional video editing.
Battery life is reliable on both models. The Plus can sometimes feel slightly more efficient due to its smaller display, while the Ultra compensates with a larger battery capacity. For users in New Zealand who spend long days traveling or working outdoors, both devices can comfortably last a full day depending on usage habits.
Software Experience and Extra Features
Both models share the same software ecosystem, including AI features, multitasking tools, and seamless integration with other Samsung devices. The Ultra model may include additional productivity tools and advanced features depending on configuration, making it more suitable for professional use.
The Plus model focuses on simplicity and smooth performance without unnecessary complexity. It delivers a clean flagship experience that is easy to use for everyday tasks without requiring advanced knowledge of phone features.
Which One Is Better Samsung S25 vs S25 Ultra
The question samsung s25 vs s25 ultra which is better does not have a single universal answer. The Ultra is better for users who want the highest level of camera performance, larger display, and advanced productivity features. It is designed for users who want a complete flagship experience without compromise.
The Plus is better for users who want strong performance at a lower price with easier handling and a more compact design. It offers excellent value while still delivering a premium smartphone experience.
Making the Right Choice
When looking at s25 ultra vs s25 plus camera, s25 plus vs s25 ultra price, and s25 plus vs s25 ultra size, the differences become clear in terms of priorities rather than overall quality. The Ultra focuses on maximum capability and advanced features, while the Plus focuses on balance and affordability.
For New Zealand users, the decision depends on lifestyle. If photography, large screen usage, and productivity matter most, the Ultra is worth considering. If comfort, price efficiency, and everyday convenience are more important, the Plus is the smarter choice.